Hot Water Tank Repair & Replacement Calgary

Hot Water Tank Repair and Install Services

Are you a Calgary homeowner in need of a hot water heater replacement? Or looking for hot water tank repair services in the Calgary area?

Call our licensed and certified team of hot water tank experts. Our family-owned business is dedicated to providing reliable and trustworthy hot water tank services, so you never get stuck with cold water.

We understand the importance of having a reliable hot water tank for your home, and we care for your home as if it were our own.

Whether you need a repair or a complete replacement, our team of experienced professionals is here to get you back to normal as quickly as possible.

Son-Rise Plumbing & Gasfitting knows that hot water is an important part of every home, and are dedicated to ensuring your home has a functioning hot water tank fast.

Get Hot Water Tank Help

Get a Quote

We’ll meet you on site and ensure you know your options.

Postal Code(Required)


This field is for validation purposes and should be left unchanged.

Hot Water Tank Repair

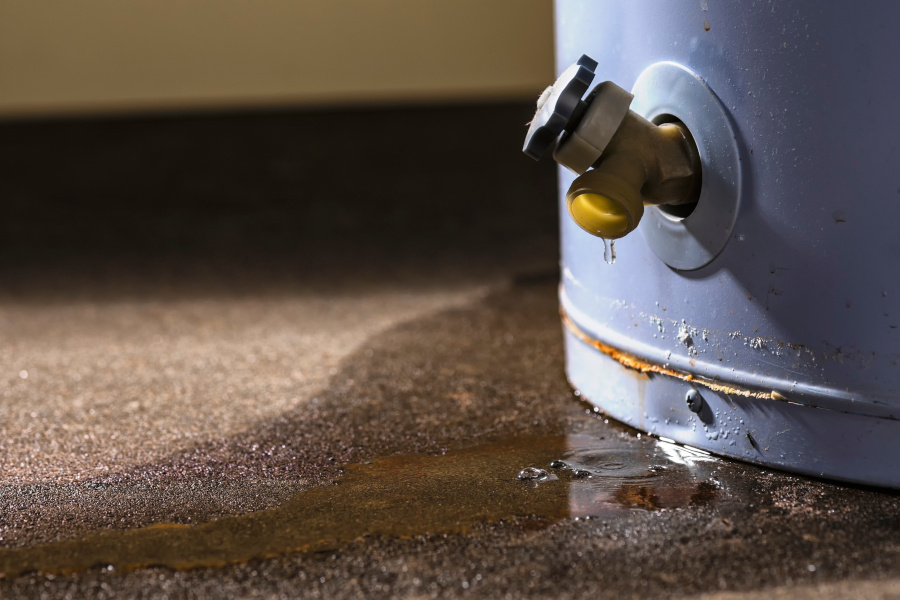
Hot water tank on the fritz? A home without hot water can be extremely frustrating.

Son-Rise Plumbing has a reputation for skilled, guaranteed work and exceptional customer service. With years of experience repairing hot water tanks, our plumbers in North West Calgary will quickly identify the problem, explain your options in simple language, and have your hot water tank running smoothly again, stress-free.

Get Hot Water Tank Repaired

banner-image-1

Hot Water Tank Installation

Decided to upgrade to a more efficient and reliable model, and now you need hot water tank installation help? We’ll handle the installation process from start to finish. We guarantee upfront pricing, so you can budget your water tank installation before we begin the work. All of our installation work is guaranteed as well.

Our experts can even recommend the perfect model for your space, home, and budget.

Looking for a tankless hot water heater instead? Son-Rise Plumbing does that too. We’ll talk you through the pros and cons of tankless units and help you decide which is best for your home: tankless or hot water tanks.

Get Hot Water Tank upgraded

banner-image-1

Our Tank Type Water Heater Brands

Bradford White Hot Water Tanks

Built in the USA, Bradford White hot water tanks have a long-standing reputation for quality. They’re a company that’s been around for over 140 years. Bradford White uses high-end materials including Vitraglas, a durable glass lining that protects the tank from corrosion.

Bradford White tanks come equipped with a self-cleaning system that reduces sediment build-up and a diagnostic system that helps technicians quickly identify and resolve issues. They’re designed to reduce energy consumption and lower utility bills, and come in a range of sizes. All Bradford White water tanks and heaters are backed by warranties and a strong guarantee.

Get a Bradford White Tank

banner-image-1

Giant Hot Water Tanks

Giant manufactures a complete line of residential water tanks and heaters. Established in Montreal in 1945, all of their units are built right here in Canada. Giant water tanks are constructed with high-quality materials including stainless steel, corrosion-resistant heating elements. Their ECOPEAK technology reduces peak demand by spreading out the heating cycle and lowering energy use and utility bills.

Giant hot water tanks also come with glass-lined tanks to protect from corrosion and a self-cleaning system that reduces sediment build-up. Giant heaters are backed by industry-leading warranties.

Get a Giant Water Tank

banner-image-1

Why Get Your Hot Water Tank Serviced With Son-Rise Plumbing?

With nearly 40 years of industry experience, we’re dedicated to bringing Calgary the best plumbing services possible. We have a reputation for courteous, respectful staff and a commitment to customer service. Our licensed and certified plumbers will put your mind at ease with their clear communication and professional work.

We offer a 100% satisfaction guarantee, giving you confidence in our hot water tank services and any other plumbing needs.

Led by Master Plumber JD MacDonald, our team has a passion for our work that goes beyond just a job. All of our guys bring this passion combined with skill, experience, and friendliness to every call.

We offer 24/7 availability for hot water emergencies, provide financing options, and we guarantee all of our work.

Get Started Today

Frequently Asked Hot Water Tank Questions

How long does a hot water tank typically last?

With proper maintenance, a hot water tank tank should last 8 to 12 years. This depends largely on the quality of installation, water quality, and how committed you are to your maintenance schedule.
If your hot water tank is more than 10 years old, it’s probably time to think about replacing it.

What are the signs that my hot water tank needs replacement?

Your first sign that your hot water tank needs replacement may be a higher than usual utility bill. If it seems like you’re using the same amount of hot water but your heater is using more energy, inspect your tank.

Another sign is no hot water at all. This may mean you have a broken heating element.

When inspecting your heater, check for leaks around the tank. A leaking tank needs replacing. Notice if there’s any unusual noises. Check if there’s rust, sediment, or cloudiness in the water. These could mean sediment or corrosion.

If you notice any of these, have your unit inspected by a professional. A replacement part may be able to keep your water tank going for a while longer. However, if it has a history of breaking down or is more than 10 years old, it’s probably time for a replacement.

How can I maintain my hot water tank to make it last as long as possible?

To make your hot water tank last as long as possible and keep it in great shape, you should expect to drain it, flush it, and clean it once a year. Inspect the anode rod every two-to-three years and replace it if it’s corroded. Check your tank for leaks or corrosion. Keep your thermostat at a safe temperature, typically around 49°C, to prevent overheating. Finally, have a professional inspect your tank occasionally and catch any problems early.

What are the differences between electric and gas hot water tanks?

Electric tanks are generally more energy-efficient, easier to install (only needing an electrical connection), but can cost more with the rising price of electricity. They take longer to heat up compared to gas models, but generally need less maintenance over time.

Gas tanks are less energy-efficient as they lose more heat through venting. They’re more complex to install, needing both a gas line and proper venting for exhaust gases. They usually cost less to run with the current lower price of natural gas. Gas hot water tanks also heat water faster but require more consistent maintenance for the gas burner and venting system.

Both types have advantages. Consider speaking to a professional before choosing.

Our Service Area

Son-Rise Plumbing & Gasfitting provides expert plumbing, gas installation and boiler repair services for Calgary and the surrounding region including: Airdrie, Bearspaw, Calgary, Chestermere, Deer Ridge, Langdon, Redwood Meadows and Willow Park.

Get Started Today


Common Parts of a Hot Water Tank

Hot water tanks have common parts that work together to provide hot water. Here are the key parts and their functions:


  • Anode Rod/Anticorrosion Anode: The anode rod protects the tank from rust and corrosion by attracting corrosive elements in the water. Over time, the anode rod corrodes and breaks down, sacrificing itself to protect the tank’s lining.
  • Thermostat: The thermostat regulates how hot the water gets inside your tank.
  • Heating Elements: Heating elements inside the hot water tank heat the water to the temperature set by the thermostat.
  • Dip Tube: The dip tube directs cold water to the bottom of the tank, where it is heated.
  • Temperature and pressure (T&P) relief Valve: The T&P relief valve is a safety feature that prevents pressure build-up in the tank.
  • Drain valve: Used for flushing sediment from the tank during routine maintenance.
  • Tank: The tank in the main metal body that holds the water while it is heated, and keeps it for when you need it and turn on a tap or faucet. They’re usually made of steel and lined with a protective coating that prevents corrosion.
banner-image-1

Each part plays a vital rule in helping your hot water tank hold and heat hot water efficiently. Over time, these parts will wear out and fail. Having a good understanding of these parts will help you know when it’s time to replace them and keep your hot water tank running at its best.

Hot Water Heater Parts

Anode Rod

The anode rod can be thought of as a “sacrificial rod” that prevents your tank from corroding.

Made from a more reactive metal than the tank, it attracts corrosive elements that attack it instead of the tank lining. Over time, the anode rod does deteriorate and must be replaced to continue protecting the tank. The anode rod is important to get the longest life from your hot water tank possible.

Signs your anode rod needs replacement include rust-coloured water, a metallic odor, and visible corrosion on the rod itself. You should inspect your anode rod every two or three years and replace it if it has less than half its original diameter left.

If you live in an area with hard water, like Calgary, you might want to inspect it even more frequently.

Checking and replacing the anode rod is straightforward if you have the right tools.

Steps for Checking the Anode Rod:

1. Turn Off Power and Water:

  • Turn off the water tank’s power and circuit breaker. For gas ones, set the knob to “pilot” or “off” and turn off the power supply.
  • Shut off the cold water supply to the tank.

2. Relieve Tank Pressure:

  • Open a hot water faucet to release pressure in the tank.

3. Locate the Anode Rod:

  • The anode rod is typically on top of the tank, under a hexagonal plug.

4. Drain Some Water (Optional):

  • Attach a garden hose to the drain valve and drain a few gallons of water to lower the water level below the anode rod.

5. Remove the Anode Rod:

  • Use a socket wrench or breaker bar to unscrew the rod. It may require significant force if it’s corroded.

6. Inspect the Rod:

  • Check for heavy corrosion or if the rod has deteriorated to less than half its original thickness. If so, you need to replace it.

Steps for Replacing the Anode Rod:

1. Prepare the New Rod:

  • Wrap Teflon tape around the threads of the replacement rod to ensure a tight seal.

2. Install the New Rod:

  • Insert the rod into the opening and tighten it securely with a wrench.

3. Refill the Tank:

  • Open the cold water supply valve to refill the tank if water was drained.

4. Restore Power:

  • Turn the power back on (and relight the gas pilot for gas water tanks).

5. Check for Leaks:

  • Inspect the area around the rod for leaks and tighten if necessary.

If you don’t feel like dealing with the anode rod yourself, you can always call the professionals at Son-Rise Plumbing & Gasfitting and we’ll be happy to help.

Thermostat and Heating Elements

The thermostat regulates the water temperature inside your hot water tank. The thermostat and heating elements work together to heat your water to a consistent temperature. Anytime the temperature drops below your set temperature, the thermostat tells the heating elements to turn on.

In electric water heaters, upper and lower heating elements work together to heat water in the tank.

The upper heating element heats water at the top of the tank first, which is where your taps are supplied from. The lower heating element maintains the temperature of the water at the bottom of the tank, which keeps hot water at a consistent temperature over long periods.

Works with the lower thermostat to complete the heating cycle once the upper level is heated.

If you have inconsistent hot water temperature (too hot, not hot enough, or fluctuates between hot and cold), this could mean you have a malfunctioning thermostat or burned-out heating elements.

If you have no hot water, both the heating elements or thermostats might have failed, especially if the tank produces no hot water at all.

If your water heater takes longer than usual to heat water, you might have a faulty lower heating element.

Faulty thermostats or burned-out heating elements can be diagnosed using a multimeter. While replacing these parts can be done by experienced homeowners, most homeowners call a professional to get it done for them.

Gas water heaters rely on a burner assembly to heat the water. If the pilot light keeps going out or the burner fails to ignite, these issues might indicate a problem with the thermostat or gas supply, both of which will need a professional.

Let’s go over how to check and replace your heating elements.

Steps for Checking a Heating Element:

1. Turn Off Power:

  • Turn off the water tank’s power and circuit breaker. For gas ones, set the knob to “pilot” or “off” and turn off the power supply.

2. Remove Access Panels:

  • Find and remove the access panels covering the heating elements and thermostats.

3. Test with a Multimeter:

  • Use a multimeter to check for continuity:
    • Set the multimeter to the lowest ohms setting.
    • Touch one probe to each terminal of the heating element.
    • If the reading shows no continuity (infinite resistance), the heating element needs to be replaced.

Steps for Replacing a Heating Element:

1. Drain the Tank:

  • Connect a garden hose to the drain valve at the bottom of the tank and direct it to a safe drainage area.
  • Open the valve to drain the tank below the level of the heating element being replaced.

2. Remove the Element:

  • Use an element wrench to unscrew the heating element counterclockwise.
  • Carefully pull the element out.

3. Install the New Element:

  • Insert the replacement element into the opening.
  • Tighten it clockwise using the element wrench.

4. Refill the Tank:

  • Close the drain valve and remove the hose.
  • Turn on the cold water supply to refill the tank.

5. Restore Power:

  • Replace the access panels and restore power at the circuit breaker.
  • Turn the power back on (and relight the gas pilot for gas water tanks).
  • Wait for the water to heat up and test the system.

Not sure you want to attempt to replace a heating element yourself? Give us a call and have one of our professionals take care of it for you.

Dip Tube

The dip tube is a long plastic or metal pipe that delivers incoming cold water to the bottom of the tank, where it is heated. It prevents cold water from mixing with hot water at the top of the hot water tank.

A damaged dip tube will leave cold water mixing with the already heated hot water at the top of the tank, giving you less-than-hot-water in your taps.

Signs of a broken dip tube include:

  • Lukewarm or fluctuating hot and cold water coming from your hot water taps
  • A shorter supply of hot water than usual
  • Pieces of plastic debris (from the broken or deteriorating dip tube) coming from your taps or caught in strainers

Steps for Checking the Dip Tube:

1. Turn Off the Power and Water:

  • Turn off the water tank’s power and circuit breaker. For gas ones, set the knob to “pilot” or “off” and turn off the power supply.
  • Close the cold water inlet valve.

2. Drain Some Water:

  • Open a hot water tap nearby to drain some water from the tank.
  • Drain a few litres of water from the tank using the drain valve at the bottom.

3. Remove the Cold Water Inlet:

  • Use a wrench or pliers to unscrew the cold water inlet connection on top of the tank.

4. Inspect the Dip Tube:

  • Pull out the dip tube. Check for cracks, breaks, or deterioration.
  • If the dip tube is broken or deteriorating, replace it.

Steps for Replacing the Dip Tube:

1. Prepare the Replacement Dip Tube:

  • Wrap Teflon tape around the threads of the new dip tube to ensure a tight seal.

2. Insert the New Dip Tube:

  • Slide the replacement dip tube into the cold water inlet opening until it’s fully seated.

3. Reattach the Inlet Connection:

  • Screw the cold water inlet fitting back into place securely.

4. Restore Water and Power:

  • Open the cold water supply valve and allow the tank to refill.
  • Turn the power back on (and relight the gas pilot for gas water tanks).

5. Test the System:

  • Run a hot water tap to ensure consistent water temperature and proper operation.

Most homeowners choose to leave this to the professionals. If you suspect you have a broken or deteriorating dip tube and you’d like to have it done for you, give us a call.

Temperature and Pressure (T&P) Relief Valve

The Temperature and Pressure (T&P) relief valve is a safety feature on your hot water tank. It releases water to relieve pressure if it builds up over a certain level, usually 150 psi. It will also release water if the temperature rises above a safe limit, usually 99°C. A malfunctioning T&P valve is a serious safety risk.

Signs your T&P relief valve might need replacing include constant dripping or leaking, visible damage or corrosion, your tank overheating, or if no water comes out when you test it.

Steps for Checking the T&P Relief Valve:

1. Turn Off Power and Water:

  • Turn off the water tank’s power and circuit breaker. For gas ones, set the knob to “pilot” or “off” and turn off the power supply.
  • Close the cold water inlet valve to the tank.

2. Relieve Pressure:

  • Open a nearby hot water tap to release pressure in the system.

3. Test the Valve:

  • Place a bucket under the discharge pipe connected to the T&P valve.
  • Gently lift the lever on the valve to release a small amount of water. If water flows freely and stops when the lever is released, your valve is working fine. If not, you need to replace it.

Steps for Replacing the T&P Relief Valve:

1. Drain the Tank Below the Valve Level:

  • Use the drain valve to drain enough water that the valve isn’t submerged.

2. Remove the Old Valve:

  • Use an adjustable wrench to unscrew the T&P valve from its opening on the tank.

3. Prepare the New Valve:

  • Wrap Teflon tape around the threads of the replacement valve to create a secure seal.

4. Install the New Valve:

  • Screw the new valve into the opening and tighten it securely with a wrench. Ensure the discharge pipe is reattached.

5. Refill the Tank:

  • Open the cold water inlet valve to refill the tank.

6. Restore Power:

  • Turn the power back on (and relight the gas pilot for gas water tanks).

7. Test the System:

  • Once the tank is full and heated, test the new valve by lifting the lever to ensure it releases water properly.

If this isn’t something you want to deal with, we’re happy to service your hot water tank and replace your T&P valve for you. Give us a call and have one of our professionals take care of it.

Drain Valve

The drain valve is located near the bottom of the tank. It lets you drain water from the tank to remove accumulated sediment, which can be harmful to the tank and lower both capacity and efficiency.

It lets you drain water when doing maintenance tasks like replacing the anode rod, heating elements, or other parts.

And it provides a way to empty the tank when you need to.

Signs your drain valve needs to be replaced can include water dripping from the drain valve when it’s closed, difficulty opening and closing it, visible corrosion and rust, and the tank not draining even when the drain valve is open.

Steps for Testing the Drain Valve:

1. Turn Off Power and Water:

  • Turn off the water tank’s power and circuit breaker. For gas ones, set the knob to “pilot” or “off” and turn off the power supply.
  • Shut off the cold water supply to the tank.

2. Attach a Hose:

  • Connect a garden hose to the drain valve and direct the other end to a safe drainage area.

3. Test the Valve:

  • Open the valve by turning it counterclockwise. If water flows freely and stops when closed, the valve is working properly. If it leaks or doesn’t drain water, it may need replacement.

Steps for Replacing the Drain Valve:

1. Drain the Tank:

  • Open the valve and allow the water to drain completely. If the valve is clogged, gently insert a small wire or tool to clear any blockages.

2. Remove the Old Valve:

  • Use an adjustable wrench to unscrew the drain valve from its fitting. Be prepared for residual water to escape.

3. Prepare the New Valve:

  • Wrap Teflon tape around the threads of the replacement valve to ensure a tight seal.

4. Install the New Valve:

  • Screw the new valve into the opening and tighten it securely with a wrench.

5. Refill the Tank:

  • Close the new valve, open the cold water supply, and let the tank refill completely.

6. Restore Power:

  • Turn the electricity or gas supply back on.

7. Test the New Valve:

  • Attach a hose, open the valve briefly, and check for proper operation and leaks.

If your drain valve looks like it needs replacing or isn’t working, and this isn’t something you want to tackle yourself, give us a call at Son-Rise Plumbing. We’ll be happy to help!

Signs You Need to Replace Hot Water Tank Parts

Regularly inspecting your hot water tank and knowing when to replace these parts will help save you breakdowns and expensive repairs.

Common indicators include:

  • Leaks or visible rust
  • Strange noises, such as popping or rumbling
  • Water that is discolored, metallic-tasting, or not heating properly
  • Inconsistent water flow or pressure

For the frequency on how often you should check these parts, we recommend:

  • Anode Rod: Check every 2-3 years for corrosion.
  • T&P Relief Valve: An annual check is recommended.
  • Drain Valve: Use it during annual flushing to remove sediment and check for leaks.
  • Thermostats and Heating Elements: Inspect once a year, especially if you’re having problems with inconsistent water temperature.
  • Dip Tube: Check it annually for damage.

A hot water tank’s performance will worsen significantly when its parts start to wear out or fail.

You will start to deal with inconsistent water temperatures, less available hot water, longer reheat times, higher energy bills, and other problems.

It’s important to stay on top of it.

DIY vs. Professional Replacement: What to Consider

While some hot water tank servicing and repairs, like flushing the tank or replacing an anode rod, can be handled by experienced homeowners, others are best left to professionals. More difficult repairs, like replacing heating elements or the T&P valve, do require some specialized tools and a bit of expertise to avoid potential hazards.

Some homeowners would rather stay hands off and just have professionals take care of everything.

That’s where we come in.

Son-Rise Plumbing & Gasfitting: Your Calgary Hot Water Tank Professionals

You know that maintaining your hot water tank and doing necessary part replacements is important.

Being proactive will keep your hot water working efficiently for years and save you money down the line.

At Son-Rise Plumbing & Gasfitting, we’ve been helping Calgary homeowners through hot water tank inspections, servicing, and repairs for almost 40 years.

We’d love to take care of your hot water tank. Give us a call at 403-274-1166 or contact us online to schedule an appointment!

Testimonials